
LightMonster Video Light Painting Software
Page menu
- About LightMonster
- License
- Donate
- Credits
- Hall of Fame
- Installation
- Download
About LightMonster
LightMonster is the creation of Dan Roberts (formerly Dan Chick, before marrying Reagan Roberts!!). It started development around 2015 and had been a personal project the grew into something more. It started with a computer keyboard interface, added MIDI keyboard as a shortlived interface, and finally settled on OSC as the best interface. It started supporting only webcams but, with some technological slight-of-hand, can support better feeds from DSLR cameras or video cameras. It was designed for live performances, and as such it doesn't currently natively record video. That said, using an external device, the video feed can be captured with no impact on the processing load of the computer running it.
See more of Dan's work at HackTheLight.com, @hackthelight on IG, Facebook, or on LightPainters.com. Check out his other public project PieceOut for making photo and light painting mosaics.
License
LightMonster is released under the Creative Commons CC BY-NC-SA 2.0 license (human readable summary). In short, it means that we provide source code to you. You are welcome to remix and change the code to your heart's content, and even to pass your changes along, but only in a non-commercial way. I request that anyone making money using software that I spent a lot of my own, unpaid, personal time building, make a donation of 5-10% of each job's income, through one of the means listed below.
Donate
If you'd like to say thanks, or if you're using this for commercial purposes, the following are ways to support Dan's creation efforts:
- Venmo: @scienceartdan
- Square Cash: $scienceartdan
- Paypal: dan@scienceart.net
Other software like this sells for $1000/year, and anything you can chip in is most appreciated.
Credits
At the time of its release in March 2020, LightMonster was completely developed by Dan Roberts. It leverages the Processing.org system and the video library that comes with it. The OSC interface was developed on TouchOSC Editor and released for TouchOSC (mobile app).
Hall of Fame
LightMonster 5-18-2017.3 from Dan Chick Roberts on Vimeo.
Installation and Use
Before you actually start installing, please read the full list of instructions. There will be things that are addressed that will answer questions you might find in the moment as you are doing an earlier step.
INTRODUCTION
LightMonster is a software project that enables real-time video light painting. It's designed to create conventional 'static' light paintings as well as providing engaging interactive 'fun light art' experiences. You can control it with a keyboard, but it's even better if you use the touch interface that can be loaded onto an Android or iOS tablet or phone.
INSTALL PREREQUISITES
This project is built on the processing.org art programming platform. Technically, this runs Java under the hood but you don't need to know anything about programming to use the program. That said, you WILL need to visit https://processing.org/download/ and install that software for your operating system. It's free, but please consider making a donation to their cause if you can. It's a lot like this project in that respect, but they are bigger and they've been around longer.
You'll also want to install TouchOSC Editor, available for free at https://hexler.net/products/touchosc. Go ahead and install it now (Resources section on that link) and we'll come back to it later. TouchOSC Editor is free, but the client program will have a small one-time fee from your app store.
SYSTEM REQUIREMENTS
Processing can run on Windows, Mac, or Linux. The better the system you have (both processor and graphics card), the higher the framerate you'll be able to light paint at. If you want to run it on Linux it's more complicated. Sven Gerard has done this and might be able to give you some pointers.
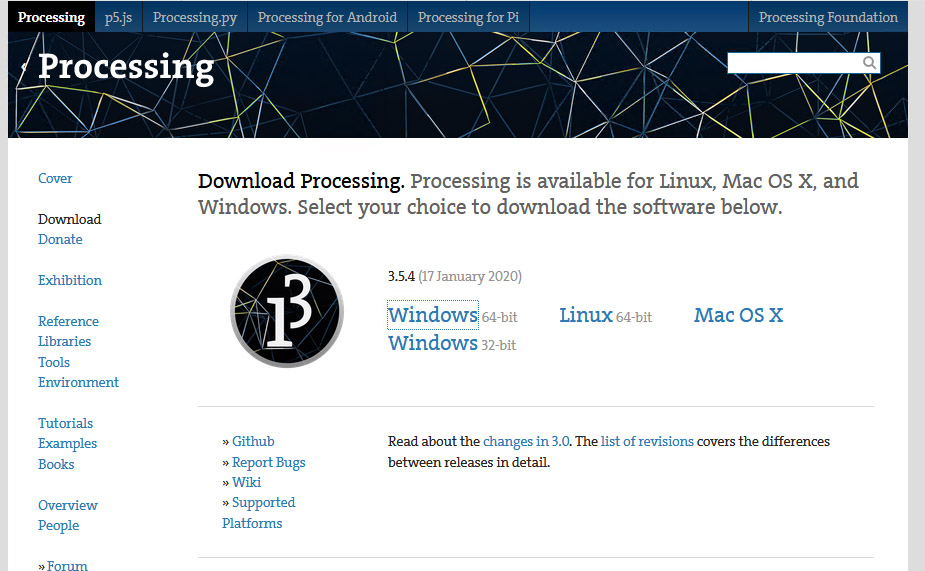
DOWNLOAD AND INSTALL PROCESSING
https://processing.org/download/
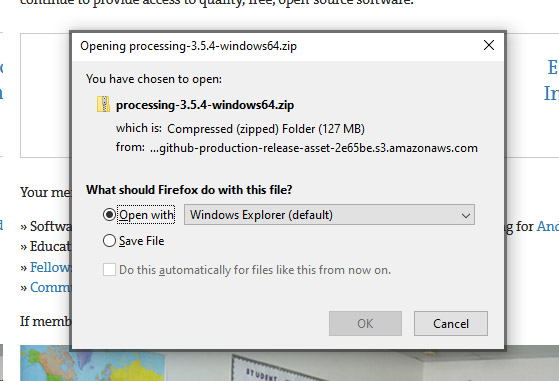
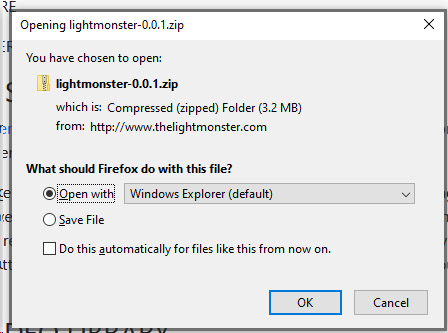
On Windows this will prompt you to download or open a .zip file.
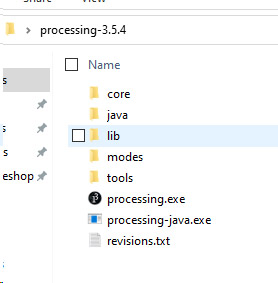
 Once you open the zip file, drag the folder insde onto your desktop.
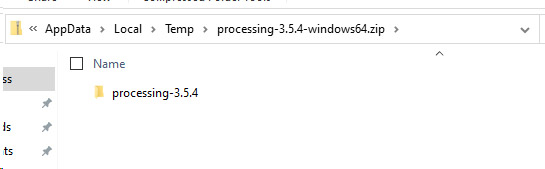
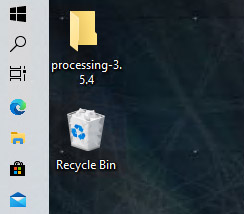 You don't have to use the desktop, but if you don't, you're on your own.
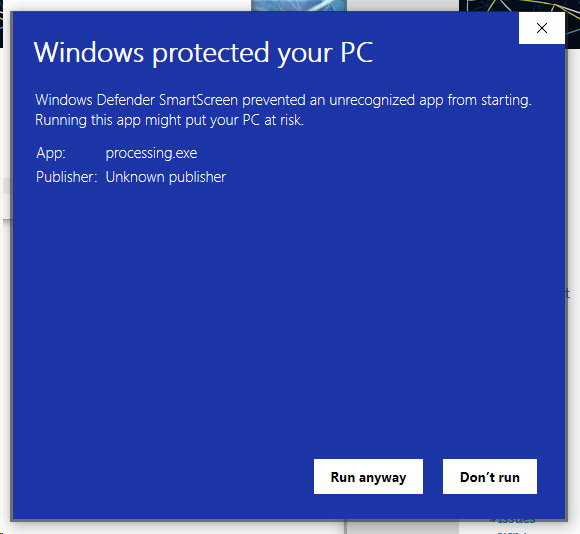
 The first time you run it, Windows may warn you about opening it.
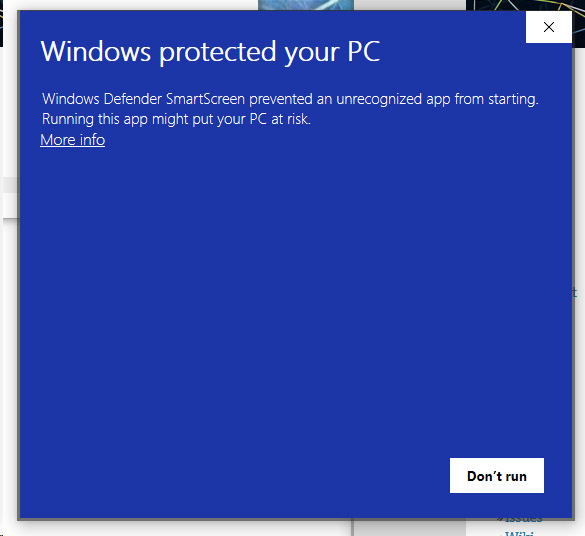 Processing.org is a reputable site and there's no danger in running this program. Click on 'more info' and then on 'run anyway'.
 You'll see
a splash screen, a welcome box, and then the main code window behind the scene.
You'll see
a splash screen, a welcome box, and then the main code window behind the scene.
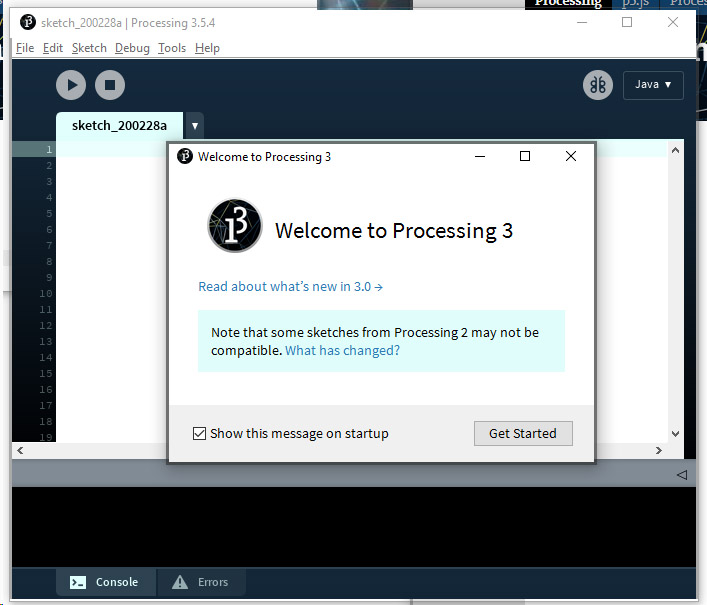 You can close the welcome box and tell it not appear in the future. (your mileage may vary on whether it does or not!) Now that you
have run Processing it should associate .pde files to run with Processing automatically. If not, we can still open them manually.
You can close the welcome box and tell it not appear in the future. (your mileage may vary on whether it does or not!) Now that you
have run Processing it should associate .pde files to run with Processing automatically. If not, we can still open them manually.
On Mac... NEED INFORMATION HERE
On Linux... NEED INFORMATION HERE
INSTALL LIGHTMONSTER, AND HOW TO RUN IT
Download the LightMonster files here and open the zip file.
 There is a folder inside called "lightmonster-0.0.1".
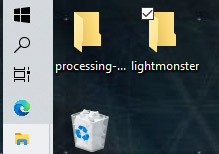
 Put that folder somewhere on your computer/laptop, preferably your desktop.
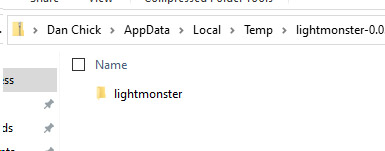
 That folder, in turn, contains a folder called "lightmonster" as well as a file called "lightmonsterOSC.touchosc". Open that folder and you'll find a list of files.
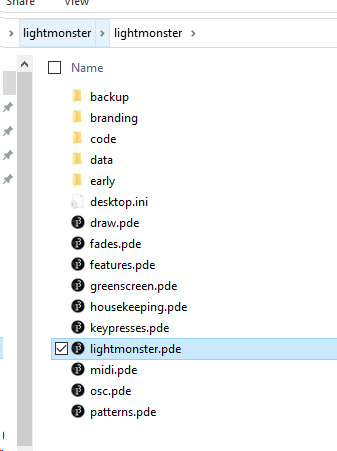
A file called lightmonster.pde will be inside that folder. This is what you will run inside of Processing. Double click on lightmonster.pde and it will open. If it
doesn't, you can go into Processing and do File -> Open and find it on your desktop.
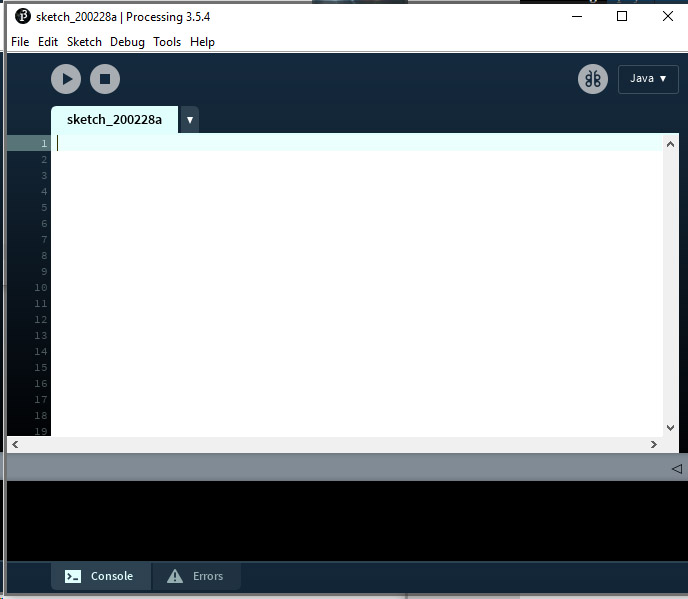
 When you open that file on your computer it will open the Processing system and several
files will be opened in editor tabs. These will have names like 'lightmonster', 'draw', 'fades', 'features', and a few more. You might see tabs that look blank
on top, but if you stretch out the window you'll see that they have names too.
When you open that file on your computer it will open the Processing system and several
files will be opened in editor tabs. These will have names like 'lightmonster', 'draw', 'fades', 'features', and a few more. You might see tabs that look blank
on top, but if you stretch out the window you'll see that they have names too.
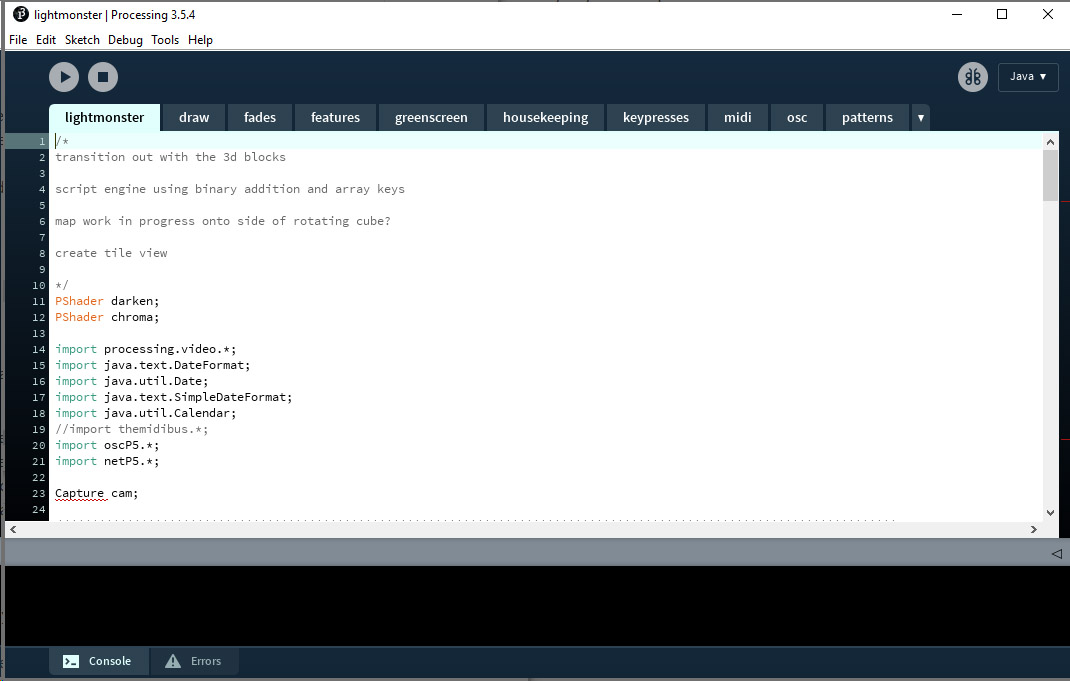 The only one you'll need to change in any way
is 'lightmonster', and inside that file there are really a couple settings you'll change. These will select your input camera and your output screen. (more on this later)
Note: the main .pde file and the folder it's in have to have the same name. Do not change that from 'lightmonster'.
Note: if there is another blank Processing window you can close it.
The only one you'll need to change in any way
is 'lightmonster', and inside that file there are really a couple settings you'll change. These will select your input camera and your output screen. (more on this later)
Note: the main .pde file and the folder it's in have to have the same name. Do not change that from 'lightmonster'.
Note: if there is another blank Processing window you can close it.
INSTALL BUILT-IN VIDEO LIBRARY
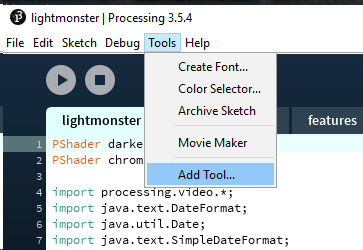
The first time you open Processing there's another step you'll need to do, but it's easy. Open the top menu called 'Tools' and select 'Add Tool'.
 When the next window opens, select the tab that says 'Libraries'.
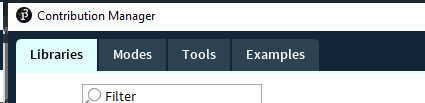 Find the entry for "Video" by The Processing Foundation, click on that line, then click 'Install'.
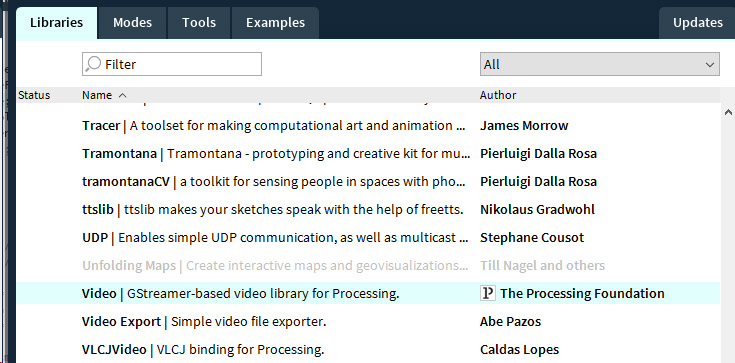
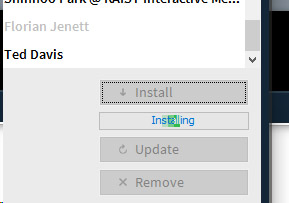 When it's finished installing you'll see a green circle with a white checkbox in it. Once you have that, you're ready to go. Close the tools window.
RUN ONCE, PICK THE CAMERA
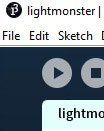
The first thing you'll need to do is run the LightMonster script. To do this, you'll click the circular button with the triangle in it (Play).
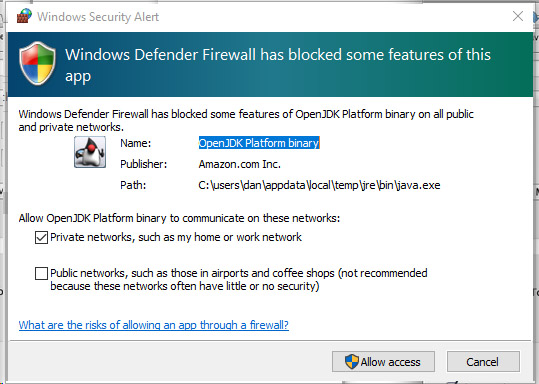
 You might be prompted to allow firewall access. The program shouldn't need this access but Processing (Java) asks for it and you can grant it if you'd like.
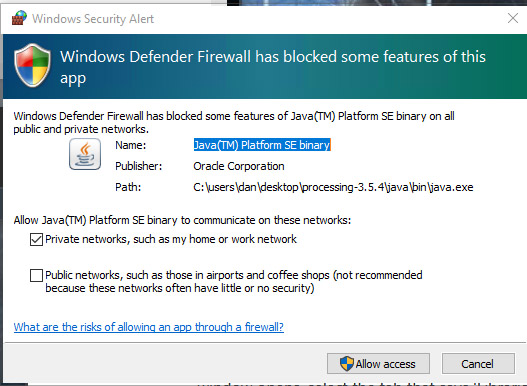 You'll see another window open that will show you the output from the default camera;
you can ignore that for now. The first time you run it might be white, black, or it might pick up a picture from your webcam.
You'll see another window open that will show you the output from the default camera;
you can ignore that for now. The first time you run it might be white, black, or it might pick up a picture from your webcam.
At any point when LightMonster is running, you can hit escape to terminate it. Since that the program is running, go ahead and hit escape to do that now.
You should see the Processing program window again. The top part has the programming code, the bottom bit, on a black background, has some program output. This area may be small,
but you can over your mouse around the top edge of it to make it larger. This area shows some program output.
You'll need to scroll up a bit until you find a section called "Available cameras".
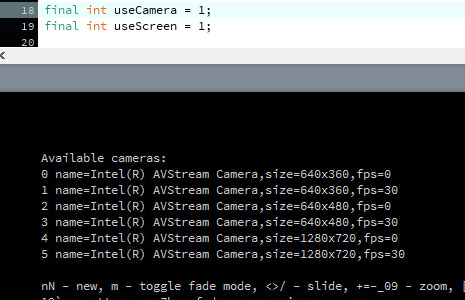 Underneath that header is a list of all possible cameras, and camera modes, that
the system can find. If you have a built in or USB webcam, you'll see that here. Look down the list and find the camera that you'd like to use, as well as the line
that ends with "size=1920x1080,fps=30". Take note of the number on the left of that line. This camera will be your full 1080 resolution with 30 frames per second.
Note: if you don't have built-in webcam, or a webcam attched, you might not see this. We'll get to how to attach a digital camera later, but we recommend that you get it working
first using your webcam.
Underneath that header is a list of all possible cameras, and camera modes, that
the system can find. If you have a built in or USB webcam, you'll see that here. Look down the list and find the camera that you'd like to use, as well as the line
that ends with "size=1920x1080,fps=30". Take note of the number on the left of that line. This camera will be your full 1080 resolution with 30 frames per second.
Note: if you don't have built-in webcam, or a webcam attched, you might not see this. We'll get to how to attach a digital camera later, but we recommend that you get it working
first using your webcam.
Looking at the tab for 'lightmonster', find the line that says
final int useCamera = 1;
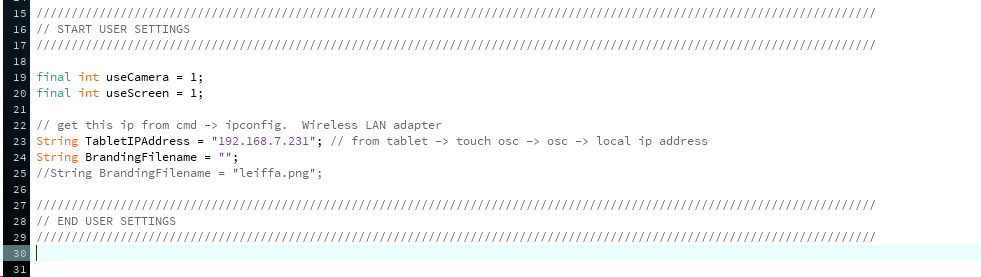
and change that number to be the number of the camera that you found in the list. Save the file (File -> Save, or Ctrl S)
As you connect or disconnect cameras on your computer, this list will change. Get used to this process, it's likely a step you'll do again in the future.
SET SCREEN/WINDOW MODE
Processing can output to a window, or to a full screen. It can be set to window mode so it behaves like a normal program but most likely you will want to run in full screen mode. This will definitely be the case if you're planning to do something commercial with it, like an event or show. The default when you get it will be to be in full screen mode on screen 1.
Your screens are numbered, and the numbering will vary from system to system. Your main screen should be 1, and any additional screens you have will go up in numbers from there. If you are running a monitor, as well as a video feed to a projector, your projector will be a number that's above 1, probably 2 or 3.
Right below the line where you set your camera, there's another line that reads:
final int useScreen = 1;
Change that 1 to be whichever screen you'd like it to appear on. You might need to try this a couple of times, and any time your setup changes.
If you want to run in a window instead of full screen, there's one more thing you have to change before you're ready to go. Jump down to line 101 in the 'lightmonster' tab. There is a line that reads:
//size(1920, 1080, P3D);
Uncomment that line out by removing the two slashes "//" at the front of the line.
On the line next to it that says:
fullScreen(P3D, useScreen);
Put two slashes in the front of that line to comment it out. This will put your program into windowed mode.
Hit 'Play' again to test your setup. Hit escape to cancel out of it.
USING A DSLR CAMERA INSTEAD OF A WEBCAM
Although you can use a built-in or external webcam, your DSLR is going to have a better picture, as well as more settings you can manually change.
There are a number of products that let you convert an HDMI feed into a virtual webcam. Most digital cameras these days will let you run an HDMI feed out of your camera. I use a device called CamLink, which accepts HDMI and then connects to a computer over USB. When this is connected, your computer will see CamLink as a webcam and you will be able to see it in your list of Available cameras.
NEED PICTURE OF THE BOX AND SETUPThe next time you run the LightMonster program, you should see CamLink cameras show up in your list. Find the one that best matches your specs and use that number. You won't see the name of your own camera, as it will be passing through the CamLink device. Find the resolution and size you want for the "CamLink" camera to use your attached DSLR.
CAPTURE HDMI STREAM
At this time, LightMonster does not do native video capture. The main reason for this is because capturing video takes up system resources, and we are trying to get all of the performance we can out of your computer! Side Note: if you have other programs open when you run LightMonster, consider closing them for peak performance.
NEED PICTURE OF SETUPI have done my video recording by inserting a Hauppauge HD PVR Rocket Portable HD Game Recorder. This device lets you run HDMI into it, a second HDMI cable out of it, and it has a USB slot that you can connect a flash drive or a hard drive to. The video will pass through the box, as you'd expect, and the whole process of recording the feed is offloaded onto this device.
INSTALL TOUCHOSC APP, INSTALL THE OSC FILE
Go to the app store and search for "touchosc". At the time of this writing it was $4.99 on both the Apple and Android stores. Once it's installed on your phone/tablet, open it. You can run LightMonster without it but you're not going to want to.
If you haven't yet, install TouchOSC Editor, available for free at https://hexler.net/products/touchosc.
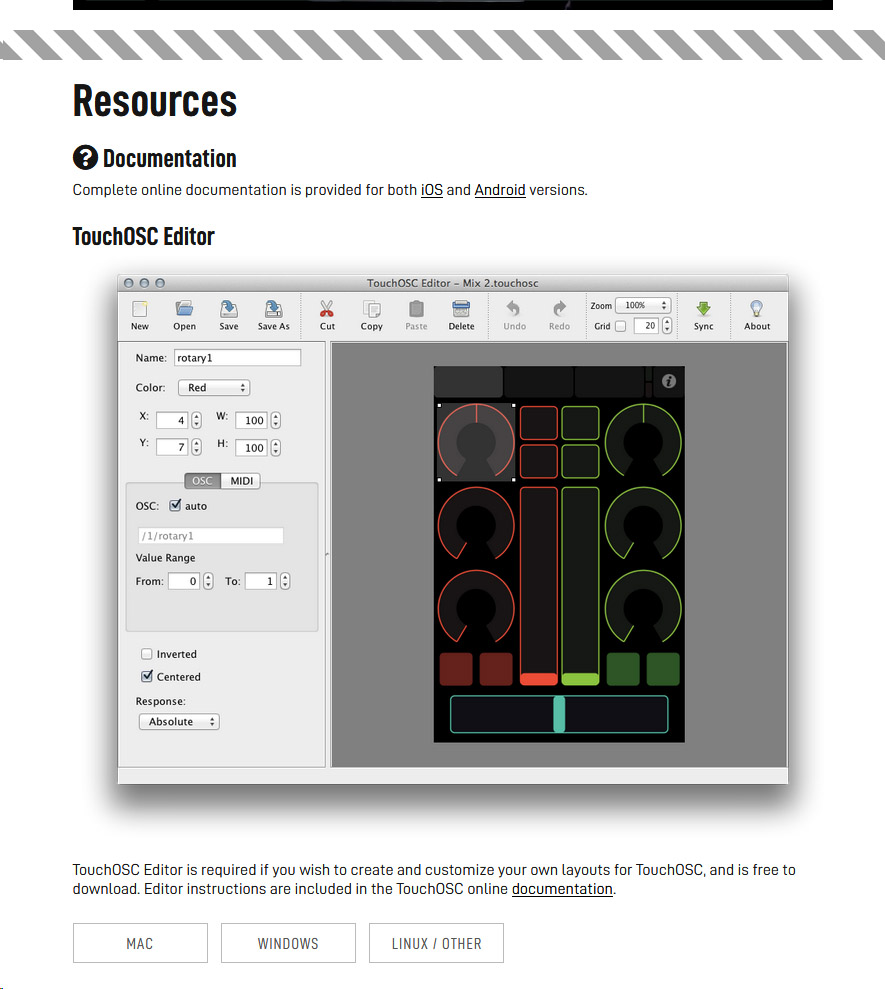 Download the right version your computer. For Windows, there's a zip file. Open it up and move the folder that's inside to your desktop.
Opening the folder, you'll see TouchOSCEditor.exe inside. Run that file. You might get another Windows firewall warning due to it running on Java. Allow access to continue.
Download the right version your computer. For Windows, there's a zip file. Open it up and move the folder that's inside to your desktop.
Opening the folder, you'll see TouchOSCEditor.exe inside. Run that file. You might get another Windows firewall warning due to it running on Java. Allow access to continue.
 In the "lightmonster-0.0.1" folder on your desktop there is a file called lightmonster.osc. Open that in the editor, then follow the steps here to transfer that file to your app.
Android: https://hexler.net/docs/touchosc-configuration-layout-transfer-wifi?android
iOS: https://hexler.net/docs/touchosc-configuration-layout-transfer-wifi
CONFIGURE TOUCHOSC
In order for TouchOSC to work, your tablet/phone and your computer will need to be on the same network, although that network does not need to have internet access. For my own performances, I have an old router with a private network on it that I plug in. Connect your phone and computer and forget about it! If you're doing this at home then just being on your local network will suffice.
Open the TouchOSC app on your tablet/phone. In the top right corner is a small square with a solid circle inside. Touch that and it will open up the Settings. Select the "OSC" line. Take note of the Local IP Address at the bottom. In the LightMonster tab in Processing, around line 35, you'll see:
String TabletIPAddress = "192.168.7.231"; // from tablet -> touch osc -> osc -> local ip address
Change that value to be the IP address that shows up on the OSC app.
Next, we'll need the IP address of your computer. At the bottom of the black output window in Processing you'll see a line that says:
"Host IP Address: xxx.xxx.xxx.xxx"
It will be followed by an IP address. Within the OSC tab on the app, enter that IP address into the Host field. Change the outgoing port to be 12000 instead of 8000. (NOTE: if you have a more complicated network setup then your Host IP address may vary. That said, if you have a more complicated network setup you probably know how to find your IP address that's on the same subnet as the OSC tablet/phone.)
On the app, go back, click done, and you'll be in business!
BRANDING FILE
If you want to superimpose a branding file for an event you can do this! Put sponsors information into the video, or your own information, or both!
In the 'lightmonster' tab, around line 35, there's a line that says
String BrandingFilename = "";
Inside the quotes, put the filename of a .png file (saved with transparency) that will be set on top of your video output. Put this file into the 'branding' subfolder of the lightmonster folder.
DESCRIBE APP
The main purpose of this app is to do video light painting. As you move lights around you'll be able to watch the image being built. At some point you'll want to start over and make a new one. You might want to save the output as a still image. This is how LightMonster started.
As I played with it, I added the ability to have the existing light in an image fade at various speeds. The next idea was to let it drift to one side or the other, or to zoom in or out. I thought about how I could use this with someone stationary, maybe playing guitar or giving a speech, and built a "stop motion slide" feature. I wrote some set programs that would do light painting mode (no fade, no zoom, no drift) for some period of time, then save the output and reset. That would be good for parties.
All of the above features are part of the keyboard, MIDI, and OSC interfaces. Realistically, the system is best used with OSC, and you won't want to even touch MIDI. The keyboard can be used if you don't have a local network, but the sliders on OSC are just so nice! I had notions of doing multipart pieces where you could save part of an image and have it be static, then add to it, conjuring up the static part or dismissing it at will. This last feature has an interface but wasn't yet built out.
LIGHT IN LIGHT MONSTER
In a camera, the shutter opens and light builds up over time, then the shutter closes. This is the picture. When you are light painting from video you have to build an image from successive video frames, where each frame is about 1/30th of a second. LightMonster, and most real-time video light painting software out there, use a "brighten" blend mode. This will impact how you light paint a bit, as the brightness of your light will have a much bigger impact on your result than the speed you're moving it at, or the duration you shine a fixed light on part of it.
On your DSLR or your webcam, you also have the ability to change your camera settings (aperture, webcam gain etc) to try to find the level of light you're happy with. On your DSLR/video camera, we also recommend focusing and switching it to manual focus. If you can do that on your webcam as well we recommend the same. Webcams can have problems refocusing if the the focal plane gets out of whack on auto.
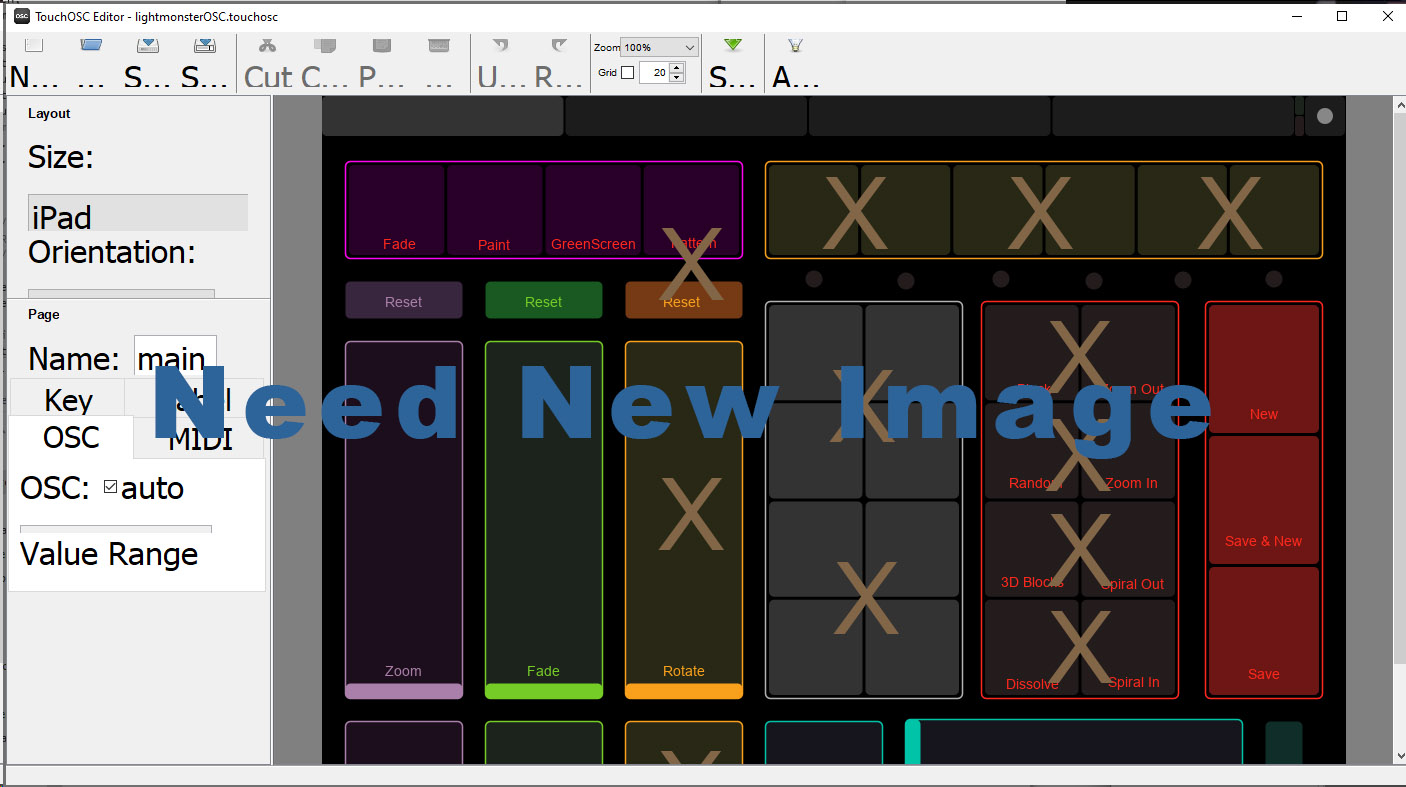
OSC CONTROLS
There are a few tabs on the top of the OSC interface. Most of your time will likely be spent on the first tab. In the top left you will select between Fade and Paint. Ignore the other two options there for the time being, they aren't yet finished. Fade will cause existing light in the image to fade away (at a speed you control). Paint is what you'll use to simulate light painting in a camera, and the light will add without fading.
The purple bar controls the zoom. You'll likely only use this in fade mode. Slide up to zoom out, slide down to zoom in. Hit the reset button to reset to no zoom at all. The purple button below it will enable or disable the zoom control.
The green vertical bar is the fade slider. The large bar is the fade speed and the matching color button below it will enable it or disable it (even in fade mode, you can turn it off). Slide the large bar up and down to control the fade speed.
The orange bar is to control rotation. I started work on this but performance suffered and I put it on hold. This is not yet useful.
The blue horizontal bar will control a left/right slide. Use the blue square to control whether it's active, then use the slider to control the speed. The reset button will reset it to no slide.
The red bar on the right gives you options to get a new, blank screen. You can also save the image at any point without resetting the screen. The third option there lets you save, then reset the screen all at once. To the left of that bar are eight transition modes. Ignore these for now, but I hope to offer customized transitions soon. Right now there's a black cut, or a 3D blocks transition, and I think I hardcoded the 3D blocks.
I don't remember what the blue squares in the center are for (presets maybe?) nor the yellow blocks in the top right.
The second tab up top gives you access to some preset patterns. The first one is "stop motion slide" and it will drift the image to the side in a ghostly mode, occasionally taking a more concret version of what it captures to drift. This is good for speakers, or for someone dancing or speaking in a single spot. The next several buttons are light painting modes that will reset after fixed amounts of time. I'll have to revisit what the the second row is all about.
The third tab is for a feature that never quite got built. The idea was that you could position a spot on the screen, then choose a direction from that spot. With the touch of a button you could save that part of the screen into an image buffer, to recall it at any time. The other buttons would recall it, or reset that particular buffer.
The fourth tab is an odd one. It's for shooting on a green screen and letting you do effects similar to the OK Go "WTF" Video. This fourth tab lets you tweak some settings for your green screen enviroment.
KEYBOARD CONTROLS
- n - New Image Reset
- N - Save and New Image Reset
- a - Toggle Stop Motion Slide
- m - Toggle mode from fade to paint, or back
- b - set fade mode to blocks
- z - set fade mode to slide
- Z - save image, set fade mode to slide
- ` - End any patterns, set mode to fade
- 1 - Pattern 1, 10 second light painting mode with fade
- 2 - Pattern 2, 20 second light painting mode with fade
- r - Random settings toggle on/off
- s - Save current image
- x - toggle mirror mode (not working?)
- . or > - Increase slide, large step
- , or < - Decrease slide, large step
- / or ? - Reset slide to zero
- { - Increase rotation (not working)
- } - Decrease rotation (not working)
- | - Set rotation to zero
- 9 - Preset for zoom
- + - Increase zoom, large step
- = - Increase zoom, small step
- - - Decrease zoom, small step
- _ - Decrease zoom, large step
- 0 - Set zoom to 0 (off)
- [ - Increase fade
- ] - Decrease fade
- \ - Set fade to zero
FORTHCOMING FEATURES
- Rotate
- Mirror mode (2, 4, 6, 8)
- More transitions
- More presets
- Third tab features for capture and buffer use
- Video capture, if it doesn't kill performance
Download
Download zip file link will be here
Copyright 2020, Dan Roberts.